
I love creating birthday cards for family and friends. I chose to make this card using some bright floral-patterned paper. It was something to help me get out of the winter doldrums and believe me, this Midwest winter has been far too harsh and LONG. I can hardly wait until Spring comes! This card will have to do for now.
This card design was inspired by one of my favorite card makers, Jennifer McGuire and her YouTube video titled “Rethinking Dies and Stamps”. This video is great and served as a reminder of how I can use my stamps and dies in conjunction to create some fresh designs. Jennifer made 22 amazing cards to prove her point. The card I made is just a small example of some of the ideas I learned from the video. If fact, I “cheated” a bit by using a piece of patterned paper for the background against my giant sentiment die. The die I used is big and cuts out the word ‘friend’, but leaves it attached to the top and bottom of the card piece you use. Thanks Concord & 9th for such a great die!
Hope you like this project. Have a great day!
How I made this project:
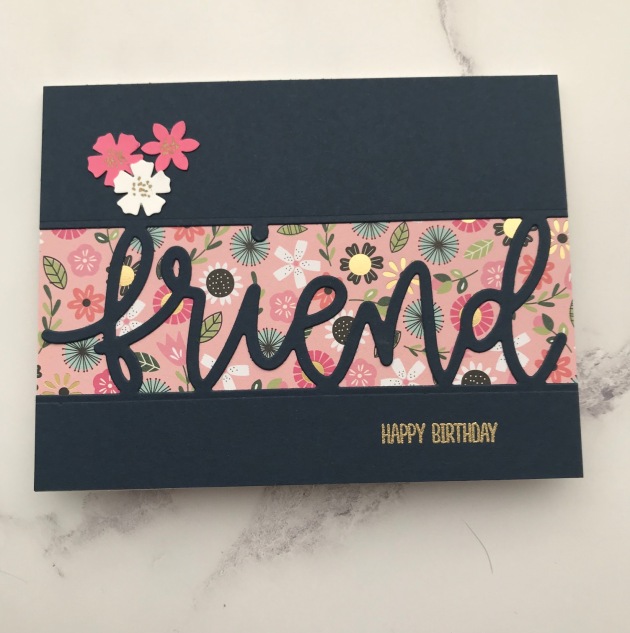
- Take an A2-sized (4.25” by 5.5”) piece of cardstock. Use a color that will coordinate or accent the pattern that you will be using for the background. In this case, there were dark blue flower and leaf accents in my patterned piece, so I chose a dark piece of cardstock to make the patterned paper “pop” against the dark, but still pull together the entire card front. Note: I apologize if the cardstock here looks black. The photograph made the dark indigo color show up as black.
- Die cut the cardstock using the die.
- Adhere the patterned cardstock behind the die-cut card front. Note: the pattern can be from a piece of patterned paper or a pattern that you’ve stamped yourself. Also, the pattern doesn’t have to be a full A2-sized piece, but it must be big enough to completely cover the opening of the die cut card front.
- For the sentiment: Chose a sentiment suitable for the occasion you want to express. In my case, I wanted to say happy birthday to my friend. I stamped my sentiment in embossing ink and then heat embossed it with gold embossing powder.
- Embellishments: The card looked plain, so I used small flower punches to punch out flowers and adhere them to the card front. The flowers happened to coordinate with the complement the flowers in the patterned paper. I also added little dots in gold ink to the centers of the punched flowers to repeat the theme of dots in the flower centers of the patterned paper. This helped to tie everything together.
- Adhere the completed card front to an A2 card base.
Supplies used in making this project:
- Stamps:
- WPlus9: And Many More (‘HAPPY BIRTHDAY’ sentiment).
- Dies:
- Concord and 9th: Peek-Through Pattern Dies (‘friend’ die used here).
- Punches:
- Small flora punches from my stash.
- Cardstock:
- Papertrey Ink: Dark Indigo (for die-cut card front piece), Hibiscus Burst (for small punched flower).
- Patterned paper by Pebbles: Girl Squad collection (pattern behind the die-cut card front).
- Neenah Solar White 110#: for card base and the white punched flowers.
- Other:
- Pilot Gold Marker (Extra Fine Point).
- Brutus Monroe Metallic Embossing Powder in Gilded.

That’s a great die! I’ve never seen it before. I like the classy look of this card. I stumbled across your blog by accident via Flickr and I really like your style. I’m following you on Flickr now and I’ll be back at your blog every once in a while.
LikeLike
Thanks for the support Barbara! I’m glad you like my cards!
LikeLike